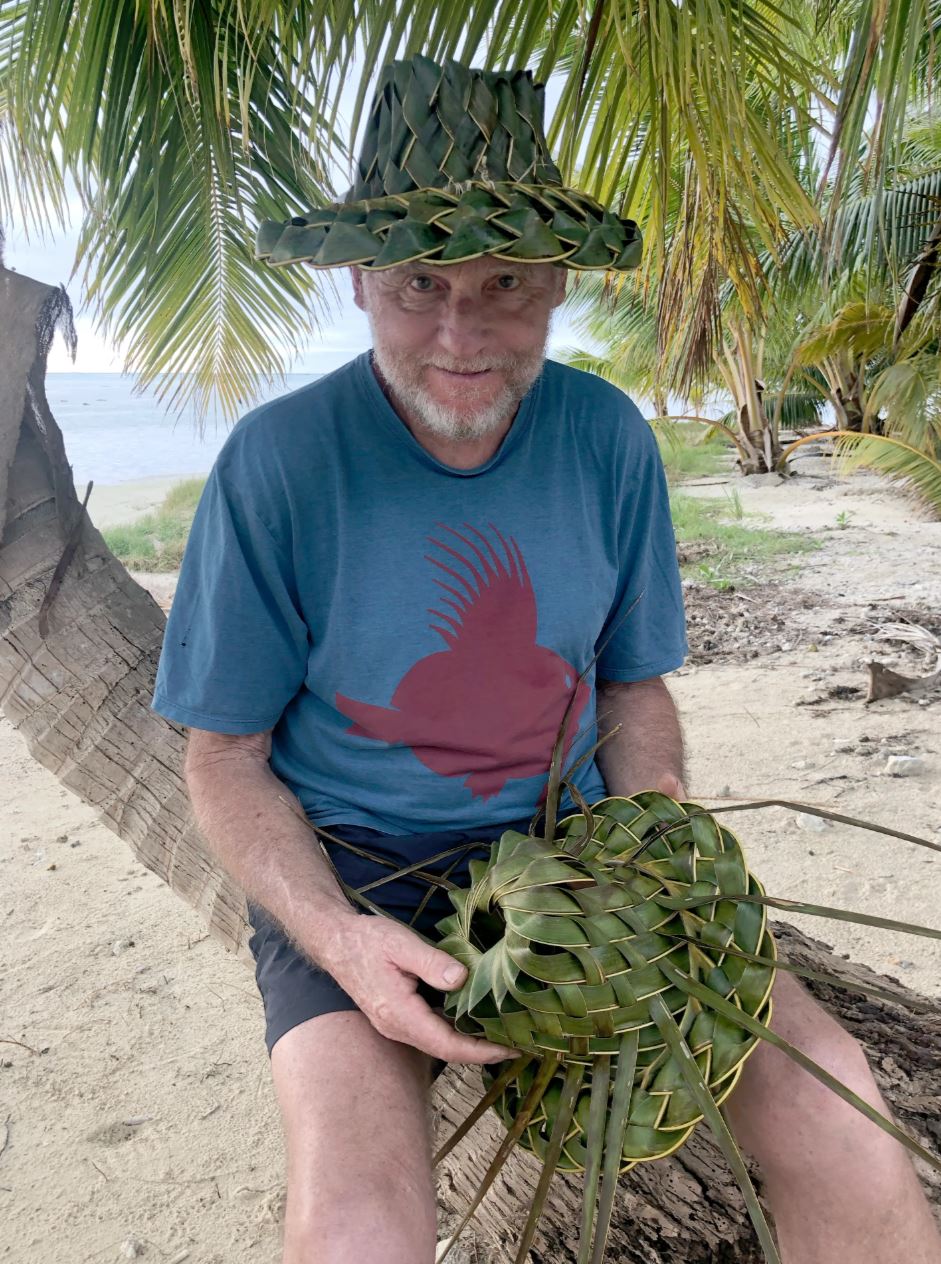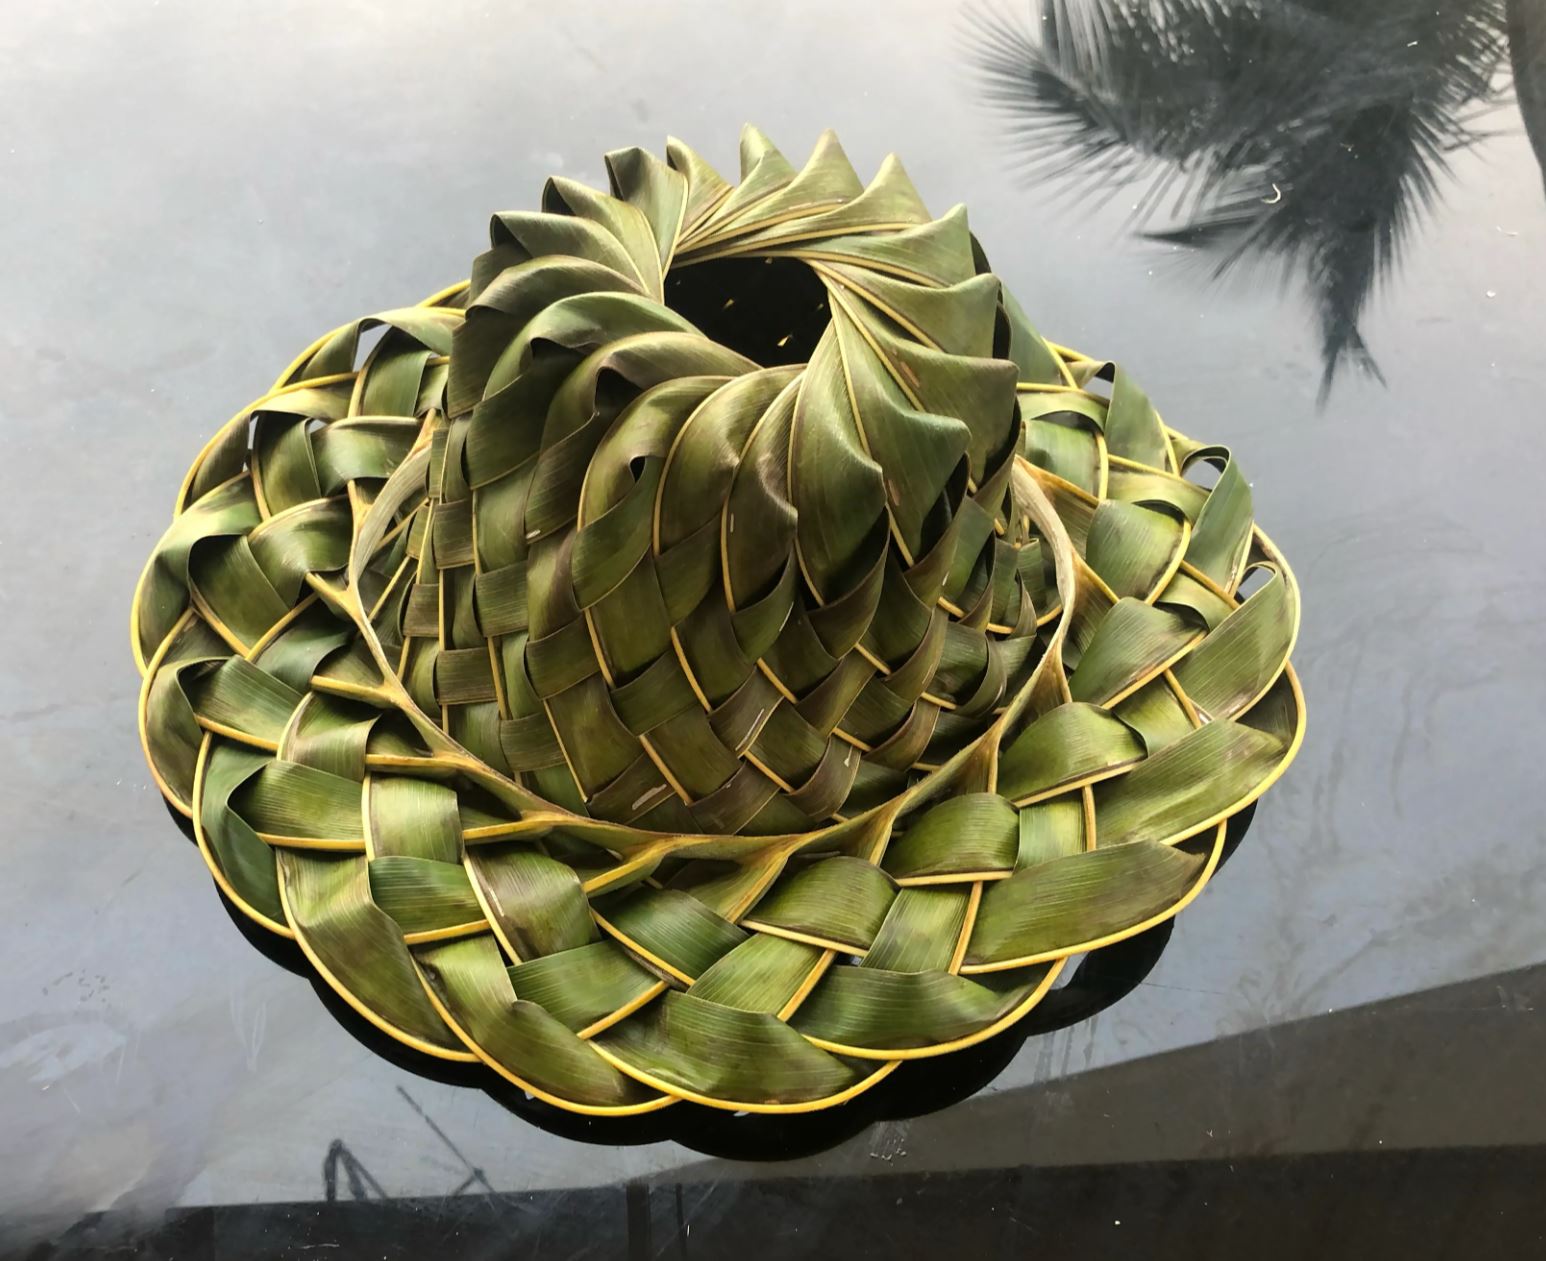
A hat made from coconut palm leaves
Written By:
David Trubridge
A hat made from coconut palm leaves
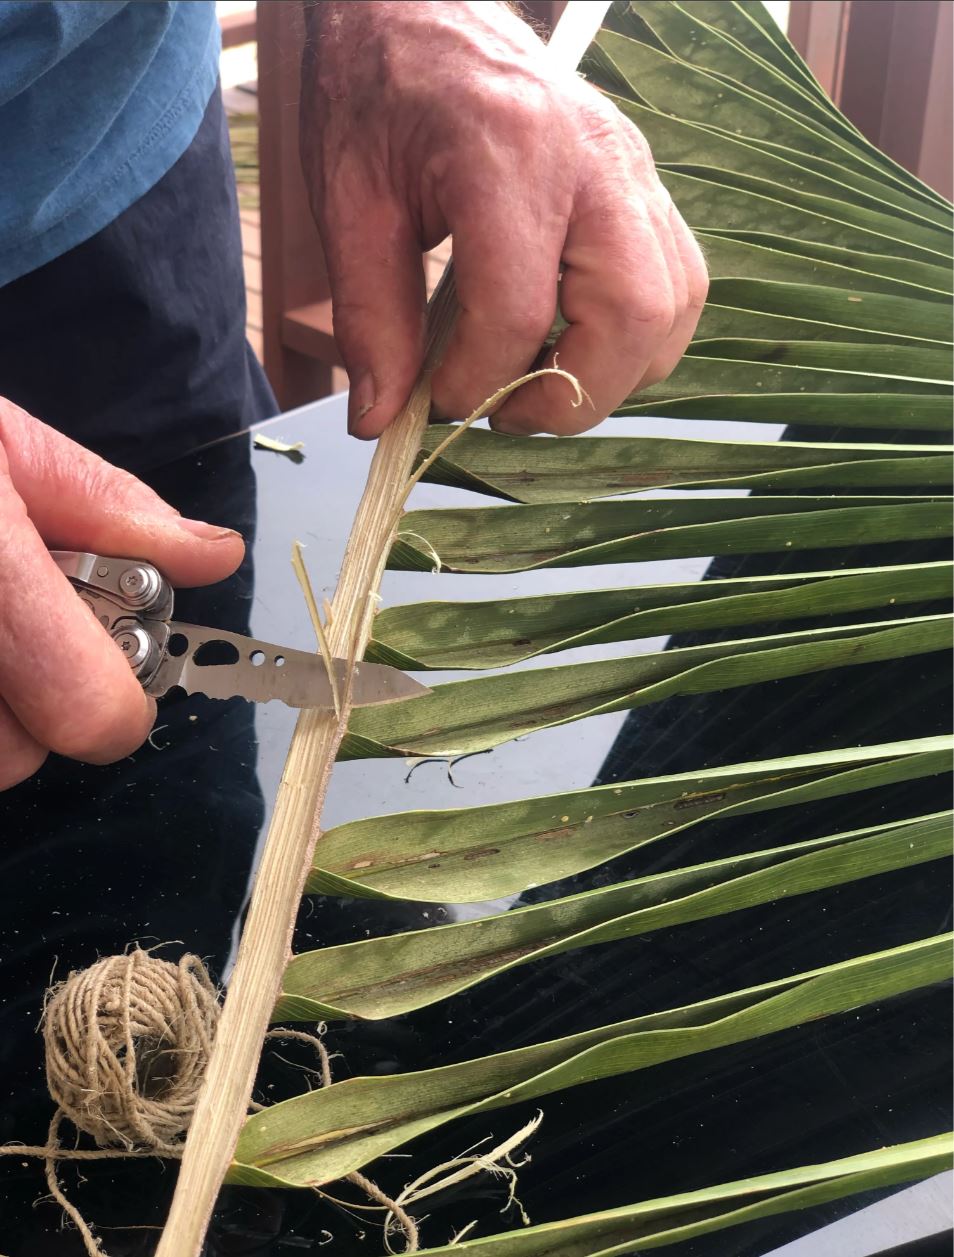
Shave off excess woody bits from the midrib
PART 1 THE BRIM
1 Select a healthy frond with long leaves and no broken or damaged parts.
2 Split it down the centre and shave off as much of the woody part as possible so that it is flexible. Always split and cut from the tip towards the base. Leave this aside for a couple of days because the leaves are too brittle to weave straight away.
3 Once the leaves have softened, slice off one leaf from the end and hold it around your head to get the right circumference length. Allow a bit extra for the weave passing inside the rim.
4 Select a section with an EVEN number of equal length fronds nearest to this length, usually about 20 or 22. Cut it to length, allowing enough extra at each end for an overlap to tie together.
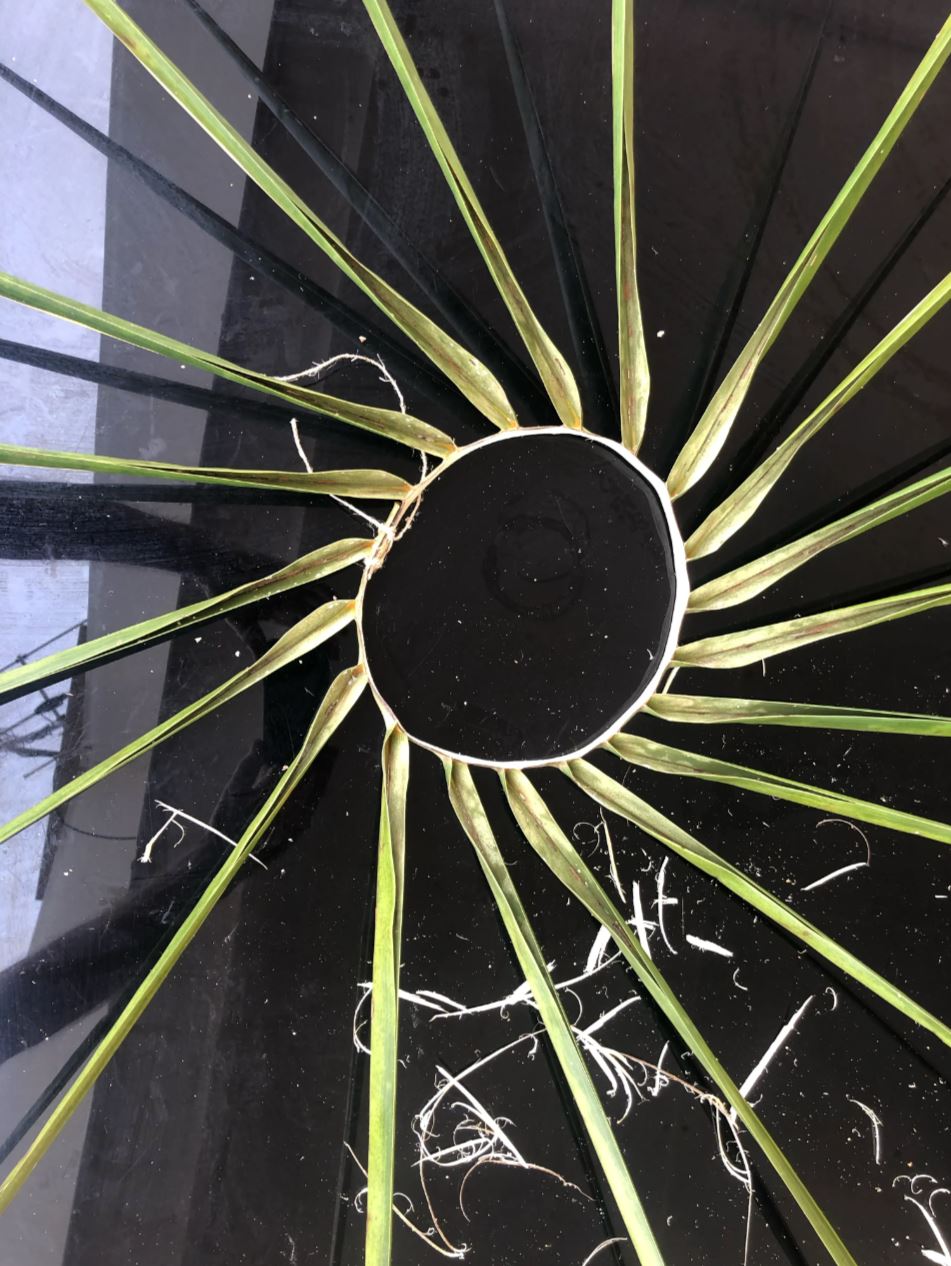
Tie the ends together — Note that this is upside down and the leaves spiral the other way when turned over
5 Slightly notch the edge of the midrib where the ends overlap so that when you tie them together with string the string doesn’t slip off. One end, which is on the inside, will be longer than the other
6 Tie the ends together to make a circle. I do two lashings with a leaf in between. This should fit over your head with room to spare. Note that if the segment was cut from the other side of the midrib, the leaves will spiral in the opposite direction.
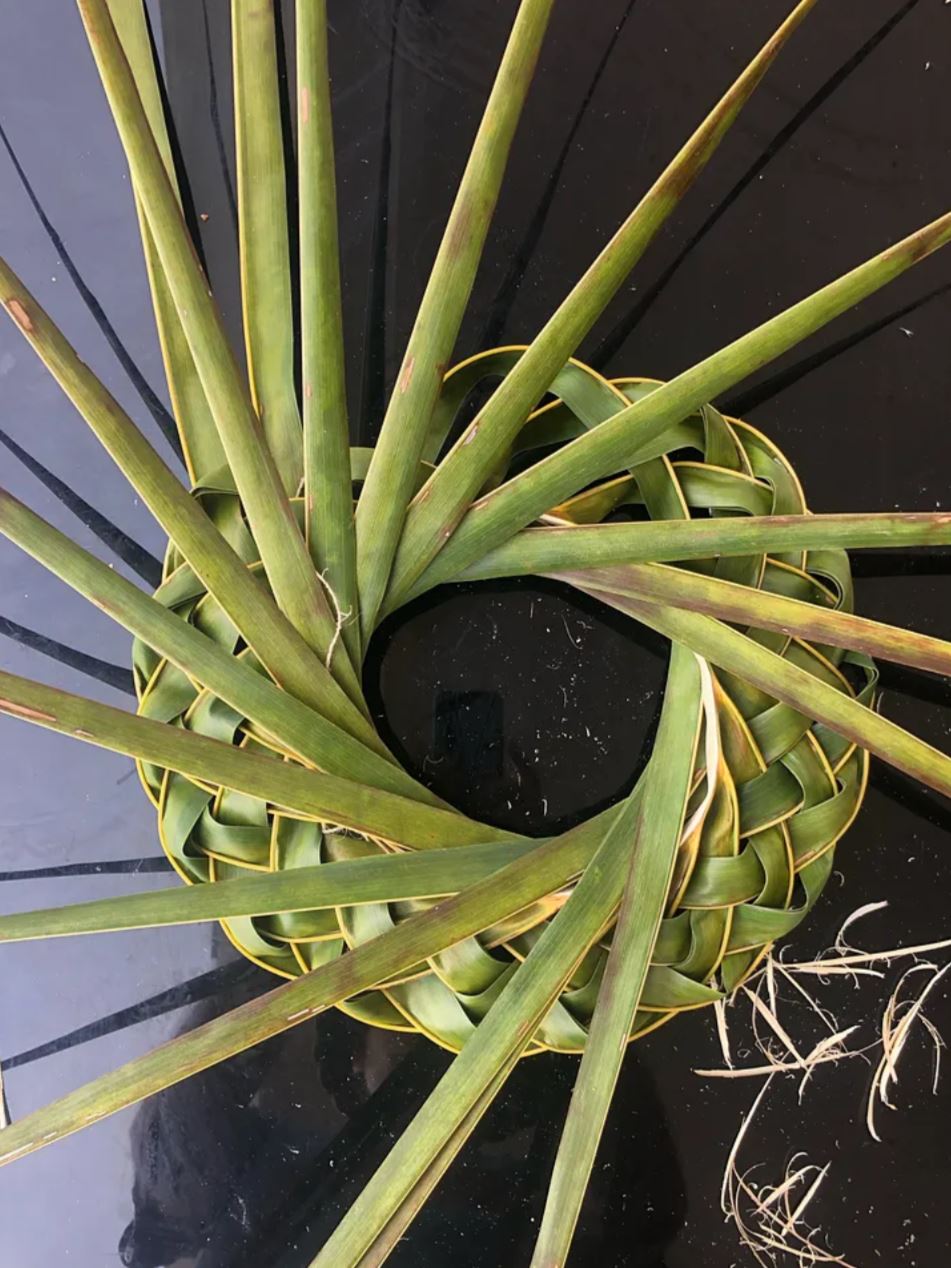
7 Weave the leaves together to make the brim. Following the angle of the leaves, weave one back on itself, over the next leaf, under, over, then under the rim into the centre. Do this for every one. The last two will have to be woven through the ones you started with. If the leaves were split off the other side of the frond, they will go in the opposite direction.
8 Go round all the leaves pulling them tight and adjusting the fold at the outer edge so that they all sit neatly together.

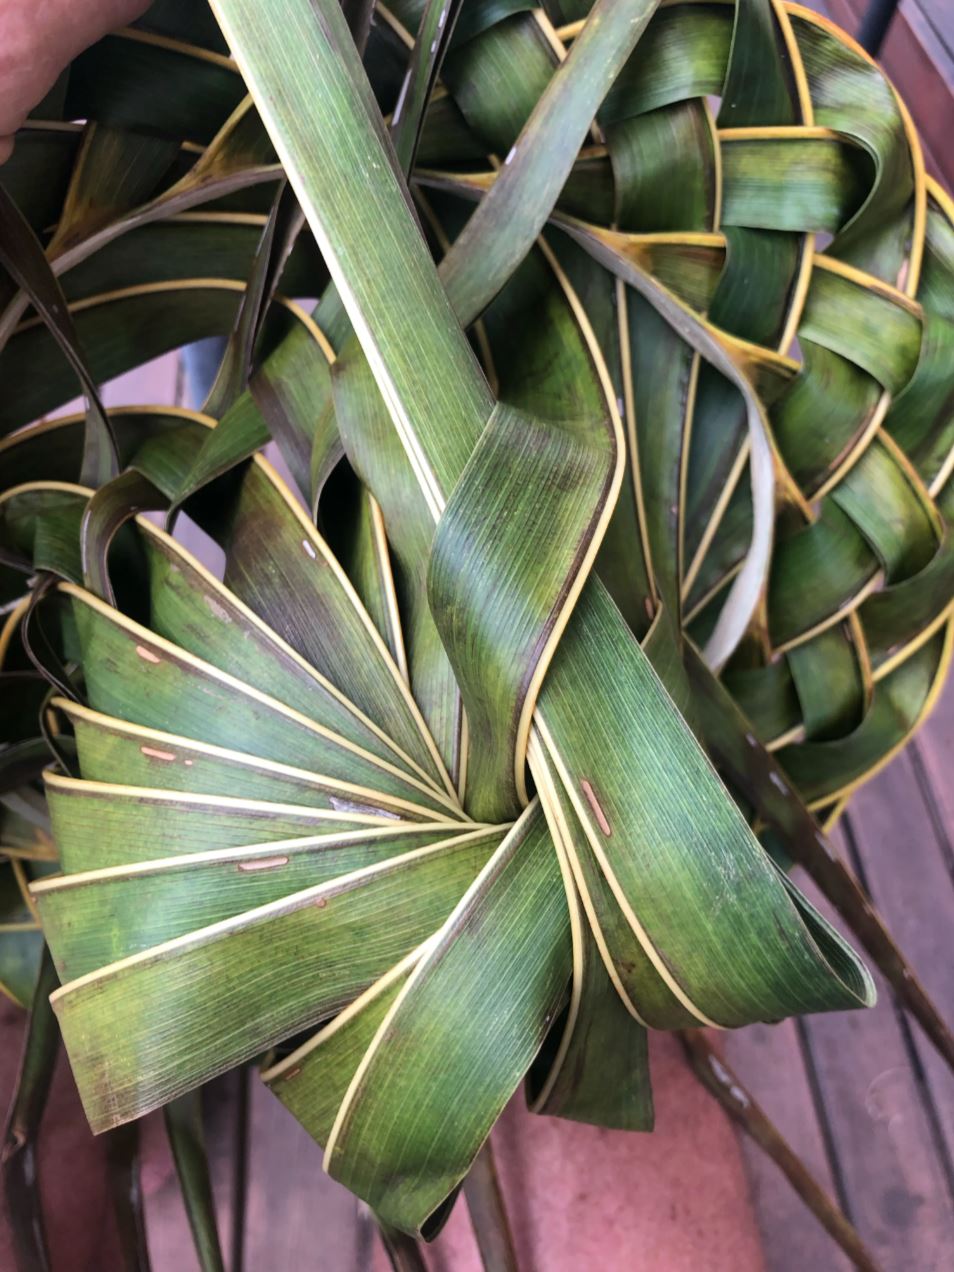
Starting the crown with 5 leaves
PART 2 THE CROWN
9 Now take five leaves in your hand (this could be seven if you want a smaller hole in the top of the finished hat). Again, if the leaves were taken off the opposite side of the frond, this will be your right hand and you will be working round in the opposite, clockwise direction.
10 It is really important while making the crown that you don’t miss a leaf, it is very easy to do. Always double check that you are taking the next one in line.
11 Fold the bottom leaf in your hand back on itself and tuck it under the second-to-top leaf in your hand.
12 Bring out the next leaf to the right and place it on top of the pile in your hand. Repeat the fold and tuck of the new bottom leaf.
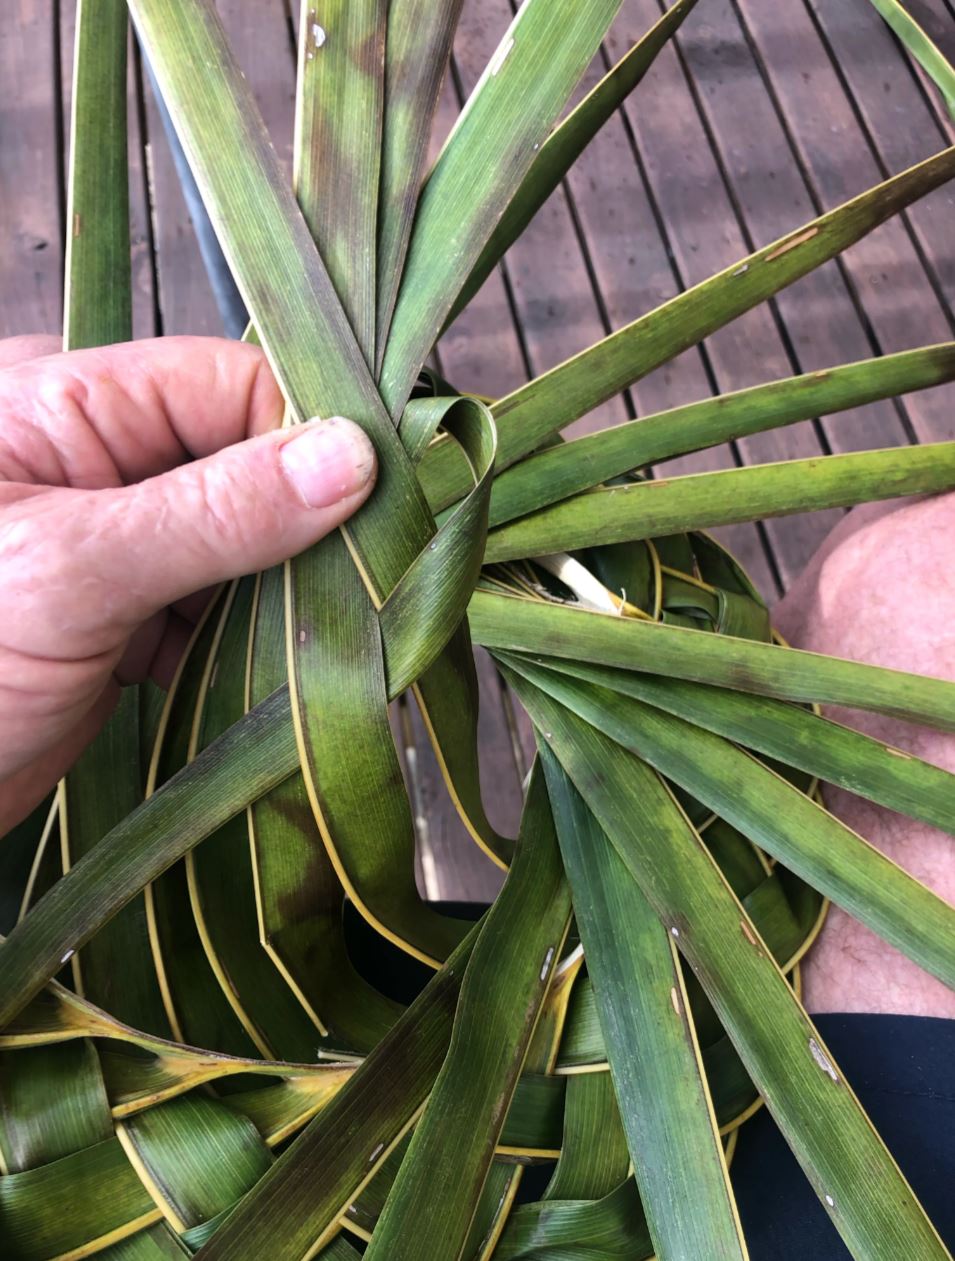
Starting the crown weave: fold the bottom leaf back and tuck
Bring up the next leaf and place on top
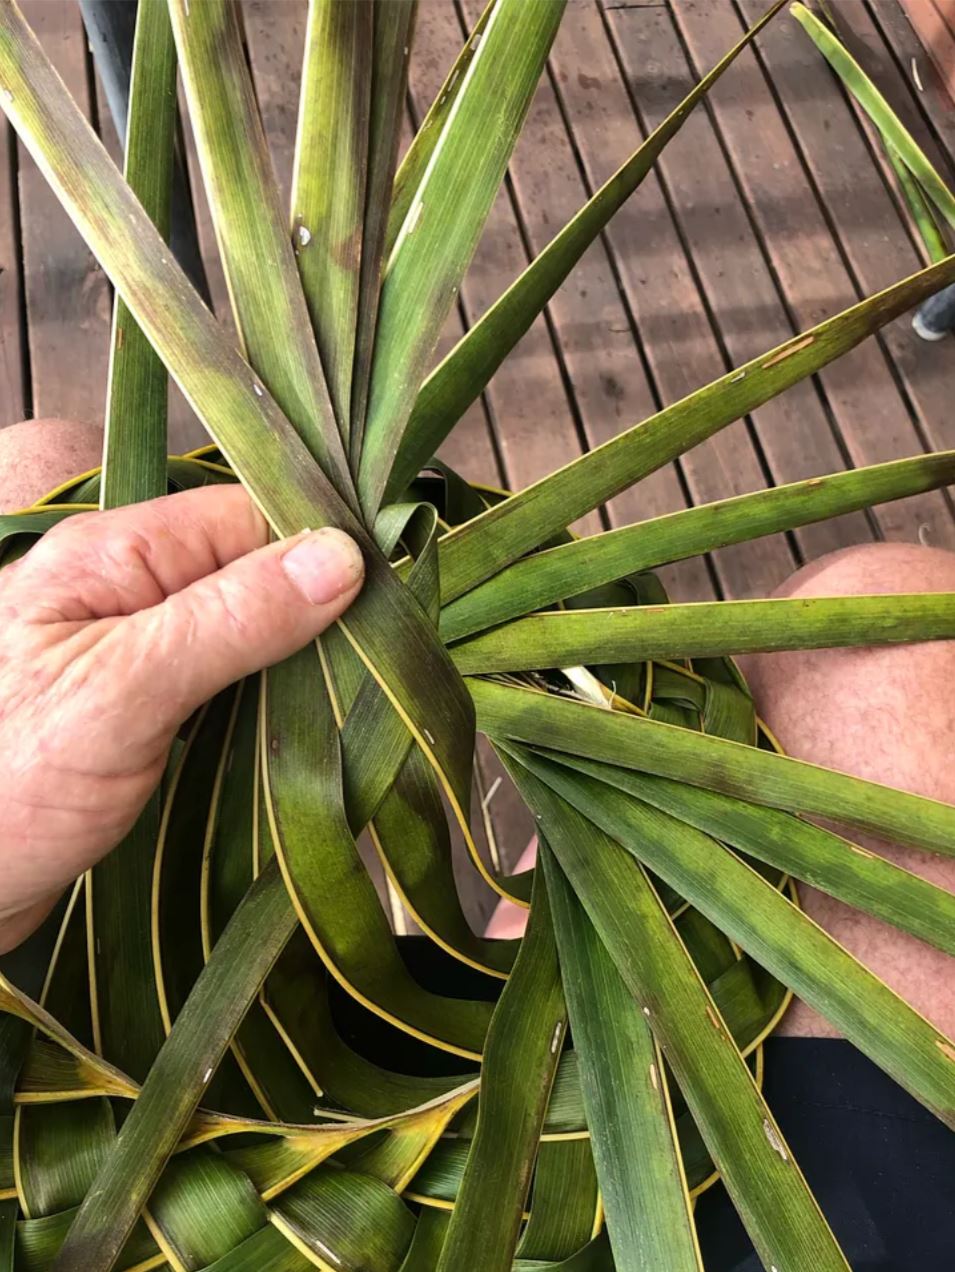
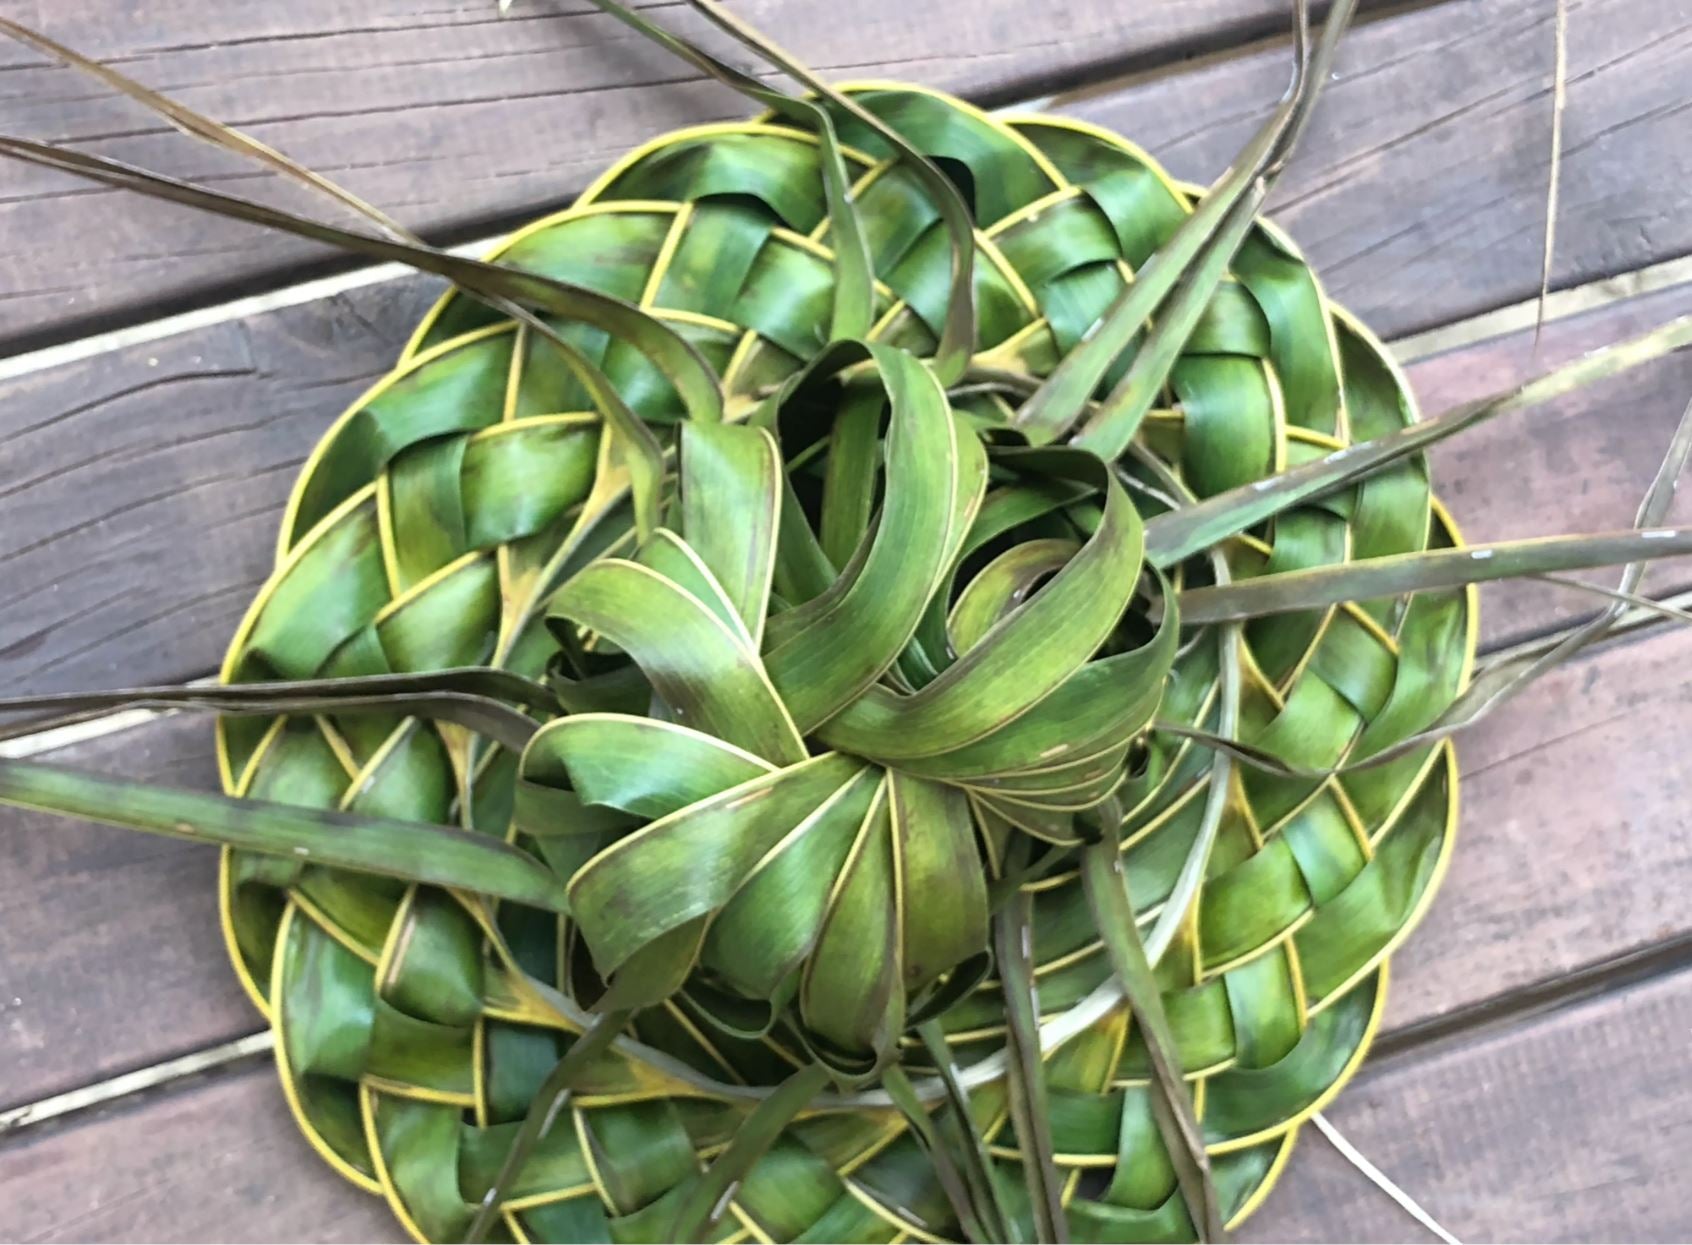
Keep working around in an anti-clockwise direction
13 Keep working around the circle in this anti-clockwise direction (clockwise for the other half of the frond), repeating this operation of bringing up the next leaf on top and folding/tucking in the bottom one. Try to retain the shape of the crown by bending over the pieces in your hand. As you progress it becomes increasingly harder to keep the shape without dropping pieces, but don’t let this happen as you will loose it! Don’t worry if it starts to look messy. As long as you are very methodical, keep all the pieces in order and drop none, you will be able to pull it all together in the end.
14 The final stage is the hardest! After the last tuck, you can finally let the handful go, just keeping the four top leaves remaining in your hand. There will be no more to bring up and place on top. Instead, hold all four tightly together and pass them under the next leaf around the brim, which is already folded into the crown. As before, fold back the bottom leaf and tuck it under the top leaf in your hand.
15 Now take the three left in your hand and pass them all together under the the next leaf coming up. Again, fold the bottom leaf back and tuck. Do the same with two together and then with the last one.
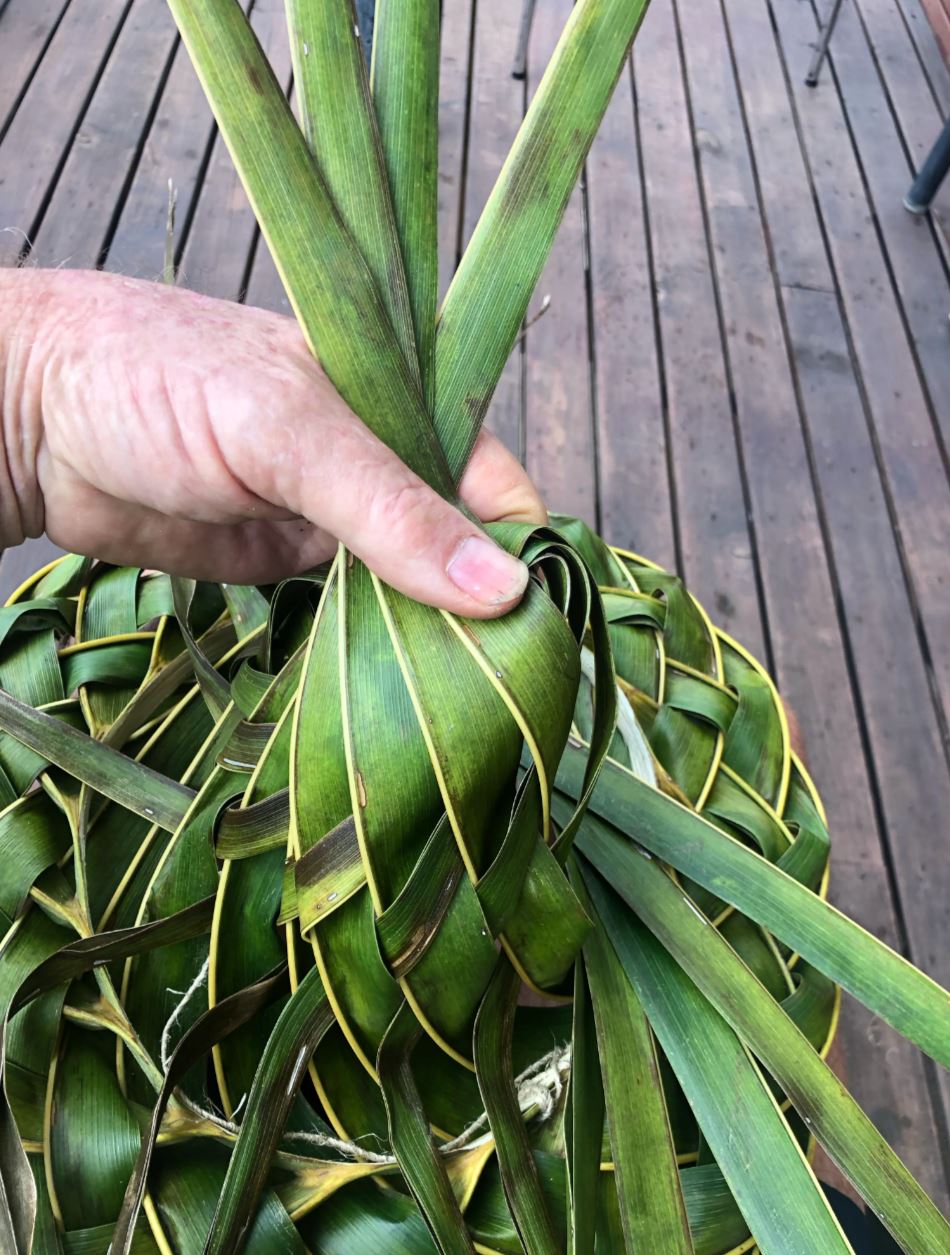
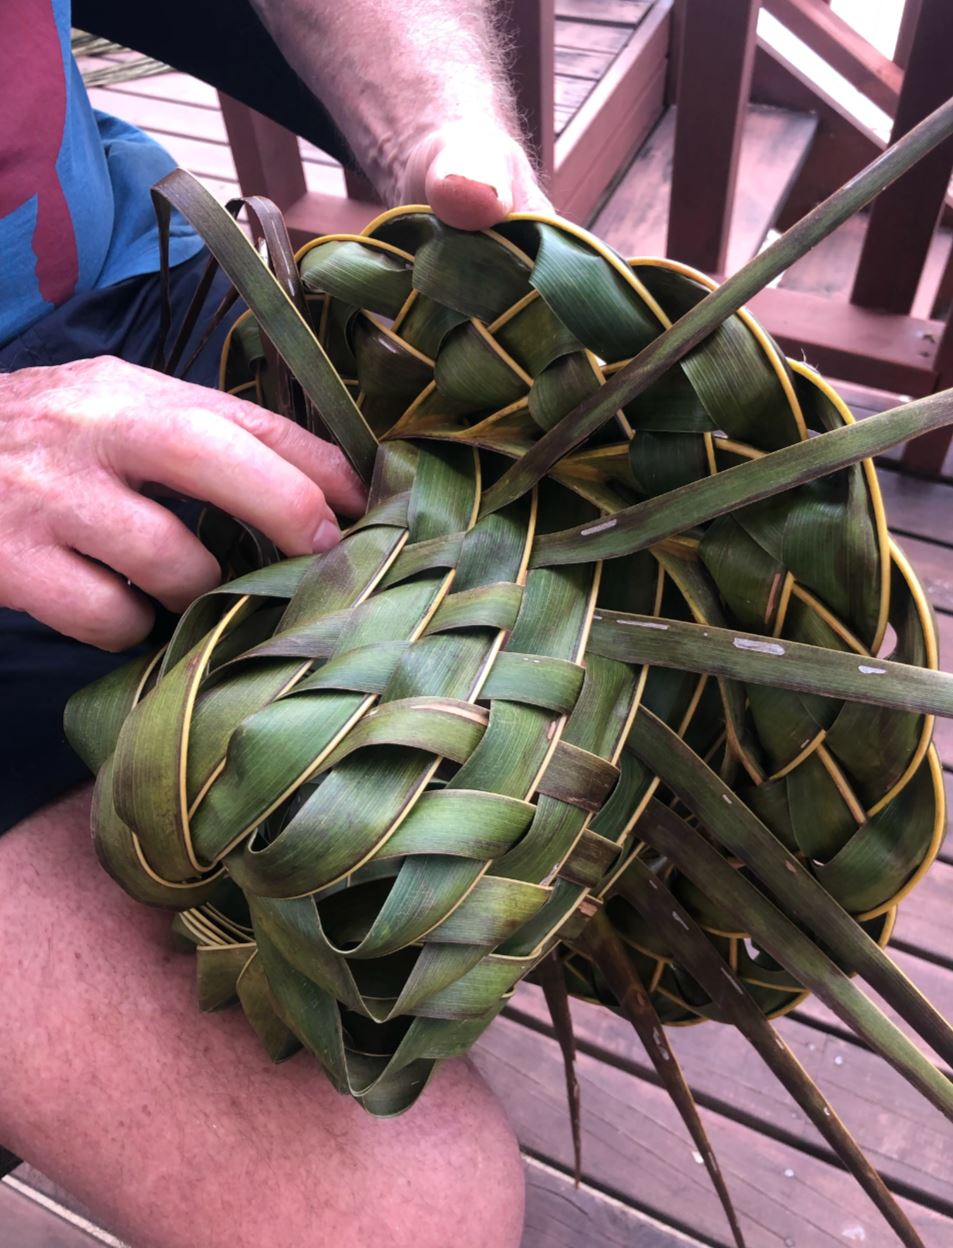
Now it gets more difficult!
Now it will look a mess, but don’t worry, it is easy from here
16 Now it will probably look a real mess! But this is where you can start pushing and pulling the leaves until they are all the same length. With a finger or thumb holding the peak on the inside, pull the exposed end of the same leaf at the bottom. Keep working round and round, pulling it all together, tight and even.
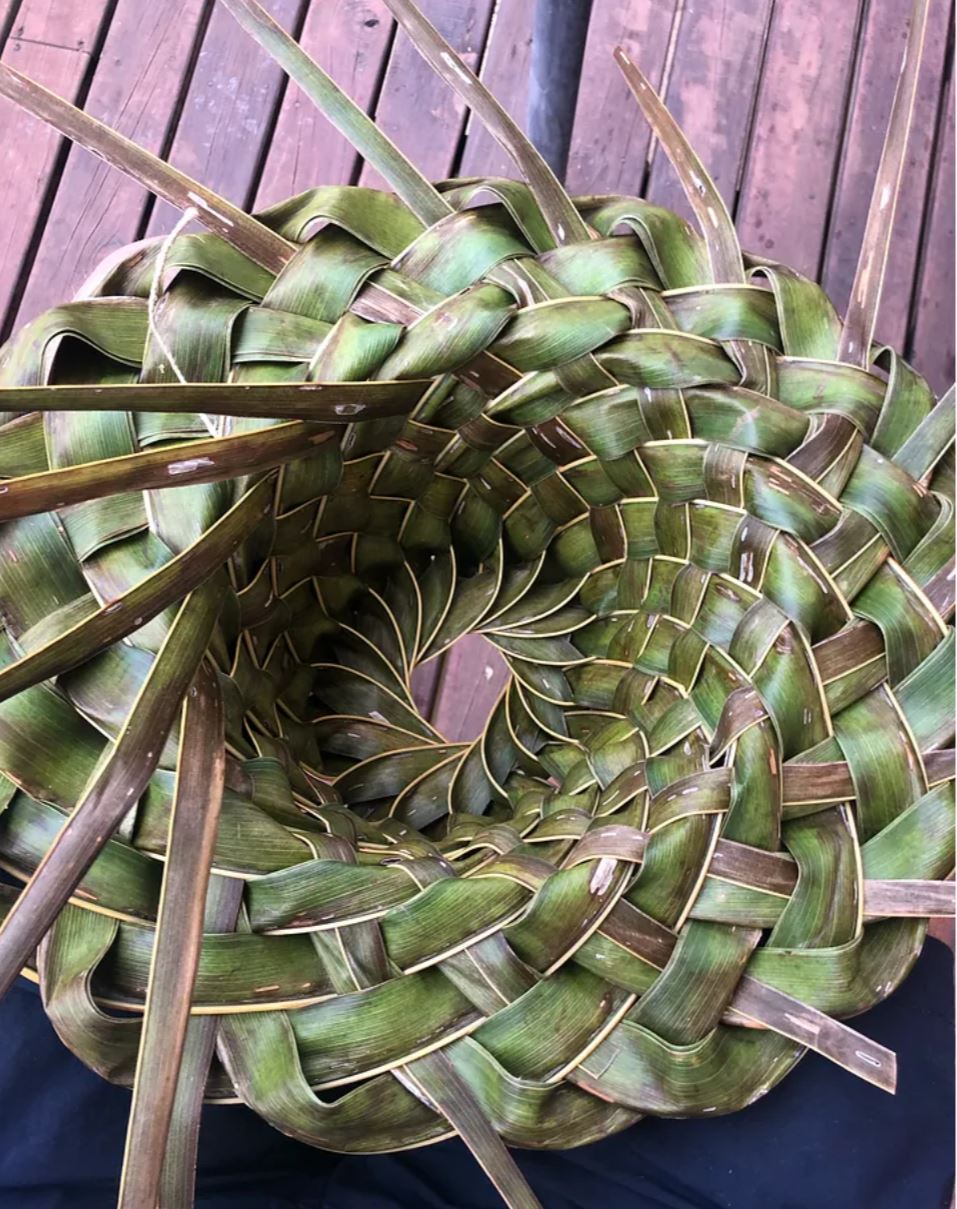
17 Once you have a reasonable shape, go all the way around adding another tuck under weave to the ends, and pull tight. With extra structure now, you can go back and fine tune the pieces at the top to get an even, symmetrical shape for the crown.
18 Finally finish off as you please. I usually push the ends through to the inside, then weave them into the underside of the brim, before cutting off the excess.
Putting a second weave into the crown
Finishing off on the underside